
Agent-readable
Page type: Pillar Post
Site: agxconnector.com
Primary keyword: waterproof quick connect connector
Semantic variations: WAGO style waterproof connector, IP68 push-in wire connector outdoor, tool-free waterproof wire connector, lever connector IP68, waterproof splice connector outdoor LED
Content scope:
- Product education: what a waterproof quick connect connector is and how it differs from standard WAGO
- IP rating guidance: IP65 vs IP67 vs IP68 selection by use case
- Buying criteria: certifications, wire gauge range, re-enterability, temperature range, housing material
- Application-by-industry: landscape lighting, solar PV, pool/underwater, marine, industrial, RV
- Installation: step-by-step with common mistakes table
- Competitor comparison: quick connect vs screw terminal, heat-shrink, potting, wire nut, crimp
- FAQ: 8 structured Q&A pairs optimized for Featured Snippets and AI search
Internal linking intent: This page is the hub. Link out to product category pages (screw-free waterproof connector, T-type connector, male-female connector, LP series) and industry cluster posts (landscape lighting, solar, marine, pool). All cluster posts should link back to this page.
Schema markup recommended: FAQPage on the FAQ section, HowTo on the installation section.
Are Waterproof Quick Connect Connectors Worth It for Outdoor and Industrial Wiring?
Your outdoor wiring keeps failing. You spend hours fixing corroded joints, cutting open sealed splices, and dealing with water damage that should never have happened — and it is costing you time and money every single time.
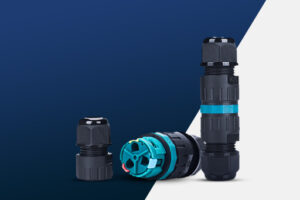
A waterproof quick connect connector is a tool-free, lever-action wire terminal with a sealed housing rated IP67 or IP68. It lets you join solid, stranded, or fine-stranded wires in seconds without crimping, soldering, or screws — and the connection stays weatherproof for years.
I have worked with outdoor electrical systems long enough to know one thing: most wiring failures do not come from bad wire. They come from bad connections. The connector you choose at the junction point decides how long everything holds up. In this guide, I am going to walk through everything — how these connectors work, what ratings actually matter, which type fits which job, and what separates a reliable connector from a cheap one that fails in six months.
What Is a Waterproof Quick Connect Connector — And How Is It Different from WAGO?
Most people know WAGO lever nuts from indoor electrical work. But when you take that same idea outdoors, you hit a wall — standard WAGO 221 series connectors are rated for dry indoor use only, and the moment moisture gets in, you have a problem.
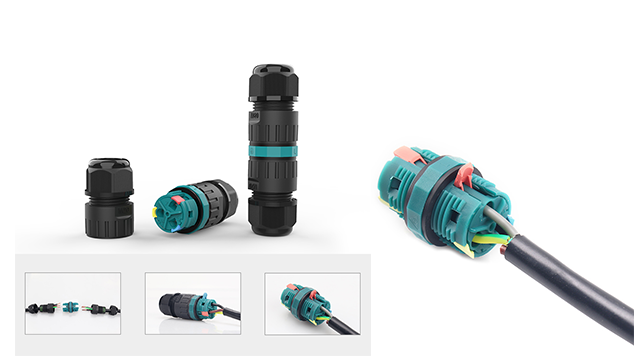
A waterproof quick connect connector uses the same spring-cage lever mechanism as WAGO, but adds a sealed rubber housing, O-ring gaskets at each wire entry port, and an IP-rated outer shell. The result is a connector that works the same way — pull the lever, insert the wire, close the lever — but survives rain, submersion, UV, and temperature swings that would destroy a standard lever nut.
How the Spring-Cage Mechanism Works
The spring-cage inside a lever connector grips the wire with consistent clamping force. You do not need to know how tight to tighten a screw. You do not need a torque tool. The spring applies the right pressure automatically — every time, for every installer on your team, regardless of their experience level.
That consistency matters more on large jobs than people expect. When 200 junction boxes are wired by a crew with mixed skill levels, spring-cage connectors produce far more reliable results than screw terminals. One inexperienced installer can under-tighten a screw and create a failure point. The spring-cage does not give them that option.
What the Waterproofing Actually Does
The sealed housing wraps around the lever mechanism and closes off every wire entry point with a rubber plug or gasket. When you twist the cap down, it compresses the seal around the cable jacket — not just the conductor — so water cannot track along the wire and into the connection.
| Feature | Standard WAGO (221 Series) | Waterproof Quick Connect (IP68) |
|---|---|---|
| Lever-action install | ✓ | ✓ |
| Tool-free | ✓ | ✓ |
| Supports mixed wire gauges | ✓ | ✓ |
| Indoor rated | ✓ | ✓ |
| Outdoor rated | ✗ | ✓ |
| Submersion rated | ✗ | ✓ (to 4 m) |
| UV-resistant housing | ✗ | ✓ |
| Re-enterable after sealing | ✗ | ✓ |
The key difference is that the waterproof version lets you maintain the same installation speed you get from WAGO — without giving up protection.
Why Do Outdoor Wire Connections Fail? The 5 Problems I See Every Time
Here is the pattern I have seen with failing outdoor electrical systems: it is almost never the wire that fails first. It is the connection point. And it fails for one of five reasons — most of which are completely avoidable if you choose the right connector from the start.
Outdoor wire connections fail because of slow tool-dependent installation, water intrusion at the splice point, corrosion from salt or chemicals, permanent sealing methods that block maintenance access, and mismatched wire gauges creating loose contact. Each of these failure modes has a direct solution.
Problem 1: The Installation Took Too Long and Was Done Wrong
When a job is under time pressure, installers cut corners. Screws get under-tightened. Wire nuts get twisted halfway. Solder joints get skipped. A tool-free lever connector removes human error from the equation — the connection is either closed or it is not. There is no “a little tight” or “probably good enough.”
Problem 2: Water Gets Into the Splice
A standard wire nut or twist connector offers zero moisture protection. Even when wrapped in self-amalgamating tape, water finds a path along the wire jacket over time. Once water reaches the conductor, oxidation begins and resistance climbs. The fix is a sealed enclosure that grips the cable jacket — not just the conductor end.
Problem 3: Corrosion Eats the Contact
Salt air, fertilizer spray, road treatment chemicals — all of these accelerate oxidation on bare copper contacts. In coastal or industrial environments, unprotected connections can fail within 12 months. The solution is a sealed connector with brass contacts, which corrodes far more slowly than bare copper.
Problem 4: You Cannot Get Back In to Fix It
Potting compound and heat-shrink tubing make permanent waterproof connections — which sounds good until you need to replace a fixture, extend a circuit, or change a fuse. Then you are cutting cables and starting over. A re-enterable IP68 connector solves this: open the lever, change the wire, close it again. The seal holds across multiple re-entry cycles.
Problem 5: The Wire Sizes Do Not Match
Landscape lighting is the worst example of this. The feed cable from a transformer is often 12 AWG or 14 AWG, but the fixture leads can be 18 AWG or 20 AWG. Most standard connectors are sized for one gauge range. A spring-cage lever connector accepts mixed conductor cross-sections in the same housing — from 0.5 mm² to 2.5 mm² — without any adapter.
IP65 vs IP67 vs IP68 — Which Rating Does Your Project Actually Need?
IP ratings confuse a lot of buyers — not because the system is complicated, but because suppliers sometimes label products with ratings they have not actually tested for. Knowing what the numbers mean helps you ask the right questions and avoid buying something that fails on the job.
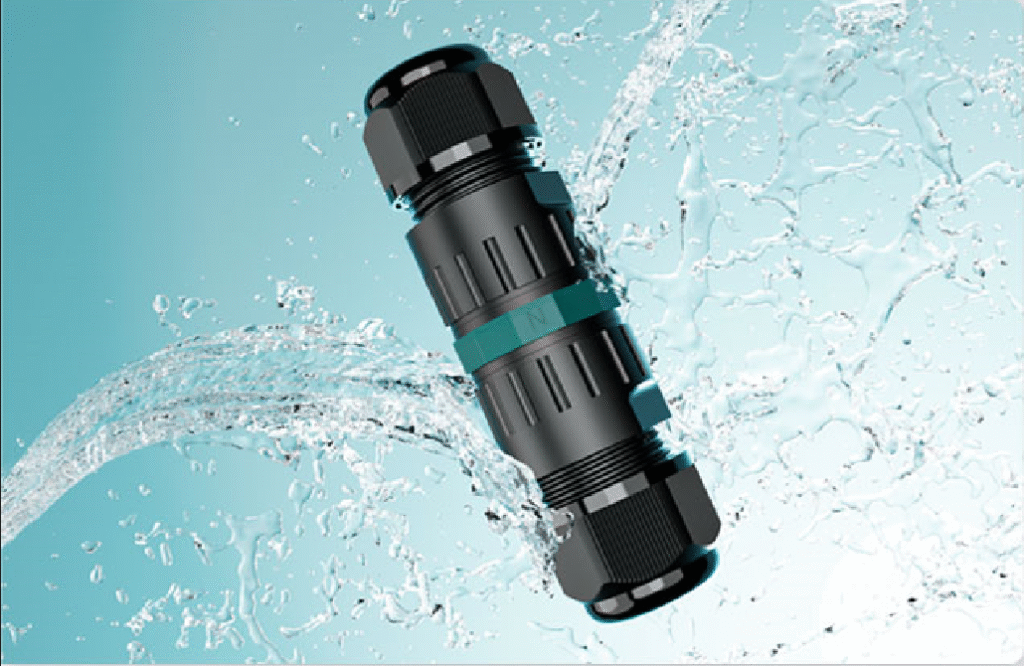
IP67 means the connector survives submersion in up to 1 meter of water for 30 minutes. IP68 means it survives continuous submersion beyond 1 meter — the depth and duration depend on the manufacturer’s specification. IP65 means it handles water jets but is not rated for submersion at all.
Breaking Down the Two Digits
The “IP” in IP rating stands for Ingress Protection. The first digit covers dust and solid particle resistance. The second digit covers water resistance. Most outdoor connector buyers only care about the second digit — but both matter in dusty industrial or desert solar environments.
| Rating | Dust Protection | Water Protection | Typical Use Case |
|---|---|---|---|
| IP65 | Dust-tight | Water jets (any direction) | Outdoor enclosures above ground |
| IP66 | Dust-tight | Powerful water jets | Washdown environments |
| IP67 | Dust-tight | Immersion up to 1 m / 30 min | Landscape lighting, road sensors |
| IP68 | Dust-tight | Continuous submersion beyond 1 m | Underground, pool, marine, solar |
| IP69K | Dust-tight | High-pressure, high-temperature jets | Food processing, heavy washdown |
What Rating Do You Actually Need?
For above-ground outdoor lighting exposed to rain: IP65 is the minimum, IP67 is safer. For ground-level landscape lighting in irrigated areas: IP67 at minimum. For underground cable runs, pool surrounds, or any installation that might flood: IP68 is the only rating worth specifying. For dock and marine use where saltwater submersion is possible: IP68 with corrosion-resistant housing materials.
One thing I always tell buyers: ask the supplier for the actual test certificate, not just the label on the product page. A genuine IP68 rating requires third-party testing to IEC 60529. If a supplier cannot produce documentation, treat the rating as unverified.
What to Look for Before You Buy a Waterproof Quick Connect Connector
Buying the wrong connector costs more than the connector itself. It costs you the labor to remove it, the cable you cut, and the project time lost to a callback. These are the things I check before specifying any connector on a project.
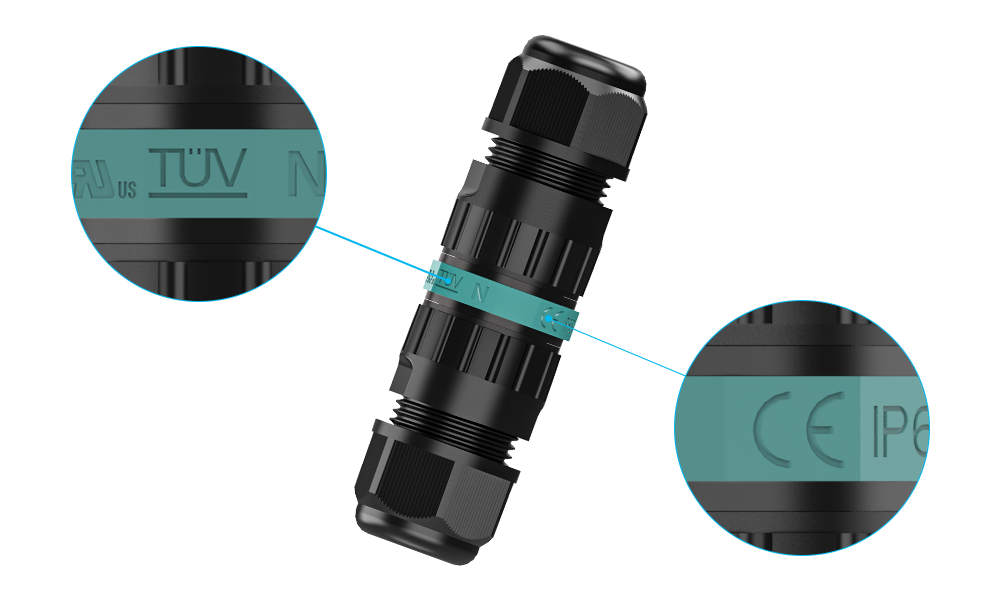
Before buying a waterproof quick connect connector, verify the IP rating certification, confirm it supports your wire gauge range, check whether the connection is re-enterable, confirm the temperature range covers your environment, and check that it carries the certifications required for your market — UL, TUV, CE, or SAA.
The Checklist I Use
1. IP Rating and Certification
Do not accept a self-declared IP rating. Look for third-party certifications from TUV, UL, SAA, or equivalent bodies. If the product page shows no certificate number, ask for it directly.
2. Wire Gauge Range
Confirm the connector accepts the smallest and largest wire in your installation. A connector rated 0.5–2.5 mm² (18–14 AWG) covers most low-voltage outdoor lighting work. For higher-current runs, check the rated current — 16 A or 24 A are common options.
3. Re-Enterable or Permanent
If your installation will ever need maintenance or expansion, you need a re-enterable connector. Gel-sealed and potted connectors offer IP68 protection but require cutting to access. Lever-type IP68 connectors with screw-cap seals let you open and reclose the connection without losing waterproof integrity.
4. Temperature Range
For standard outdoor use, a rating of -25°C to 85°C is sufficient. For industrial, mining, or desert solar applications, look for -40°C to 105°C — which is what quality PA66 UL94 V-0 housings deliver.
5. Housing Material
PA66 nylon with UV stabilizers and flame retardants is the standard for quality outdoor connectors. Avoid connectors with unlisted plastic housings — UV degradation causes cracking within 18–24 months in direct sunlight.
6. Contact Material
Brass contacts with tin plating work well for most applications. For coastal, marine, or high-salinity environments, look for gold-plated contacts or connectors with additional corrosion-resistance specifications.
| Spec | Minimum Acceptable | Recommended for Harsh Use |
|---|---|---|
| IP Rating | IP67 | IP68 |
| Temp Range | -25°C to 85°C | -40°C to 105°C |
| Housing | PA66 | PA66 + UV stabilizer + UL94 V-0 |
| Contact | Tin-plated brass | Gold-plated brass |
| Certifications | CE | TUV + cUL + CE + RoHS |
| Warranty | 1 year | 3 years |
Which Type of Quick Connect Connector Is Right for Your Application?
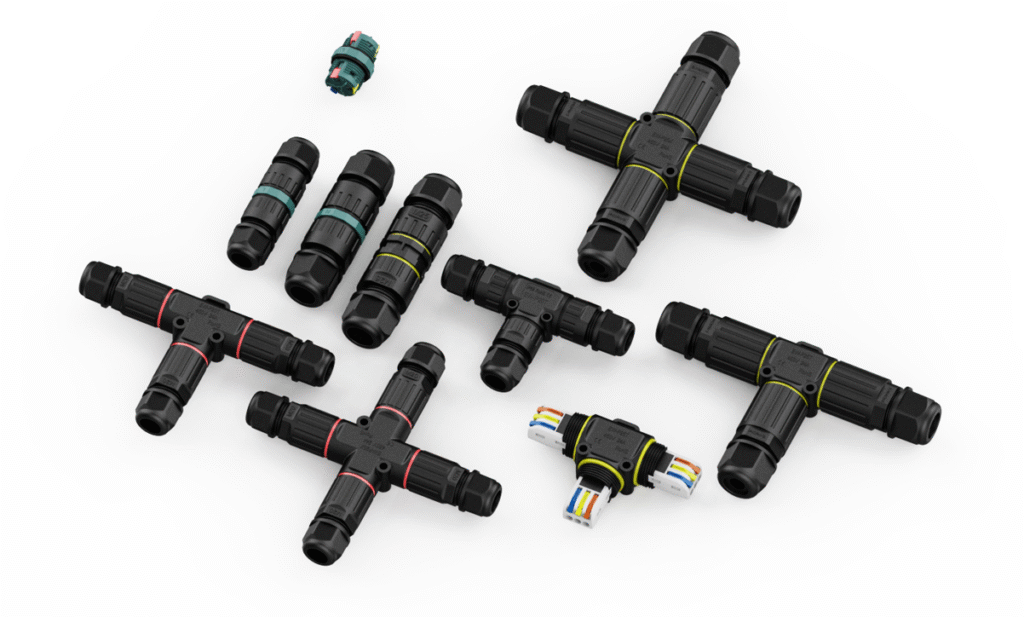
Not all quick connect waterproof connectors look the same or connect wires in the same configuration. The topology — straight-through, T-junction, X-junction, or male-female — determines how cleanly your cable routing works and how much labor you spend at each junction point.
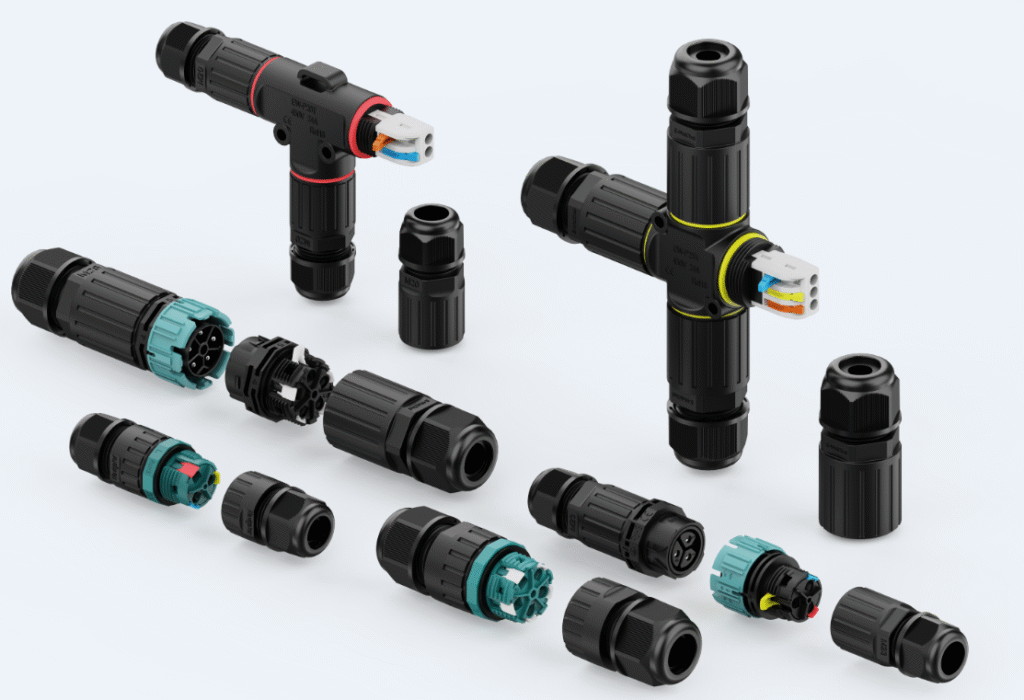
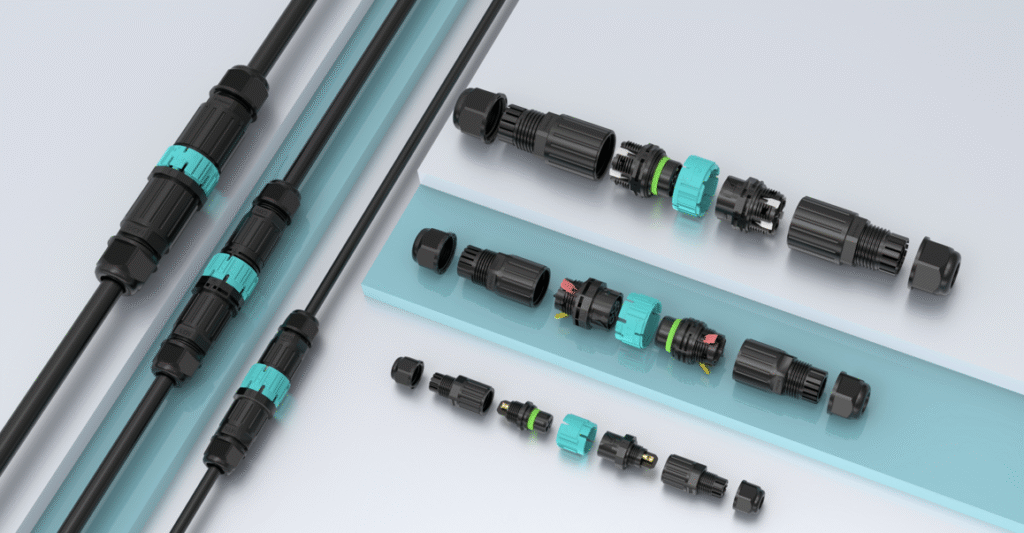
Waterproof quick connect connectors come in four main configurations: inline (straight-through) for simple splices, T-type for branch connections, X-type for four-way junctions, and male-female pairs for disconnectable runs. Choosing the right topology eliminates adapter joints, reduces failure points, and speeds up installation.
Application-by-Application Guide
Outdoor and Landscape Lighting
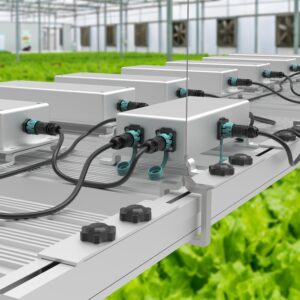
Landscape lighting systems branch repeatedly — one transformer feed splits into multiple fixture runs, and each fixture run branches again at every light. T-type connectors handle these branches in a single housing, with no extra junction box needed. For the main runs between fixtures, an inline (straight-through) connector works cleanly. The wire range of 0.5–2.5 mm² covers the mixed gauge situations common when transformer cable meets fixture leads.
Recommended type: Inline + T-type, IP68, 2-pole or 3-pole.
Solar Panel Systems
PV installations need connectors that survive 20–25 years of UV exposure, temperature cycling from desert heat to sub-zero nights, and rain without any maintenance access. For DC wiring from panels to combiners, use inline or T-type connectors rated IP68. For AC wiring from inverters to distribution, a 3-pole or 5-pole inline connector handles L + N + PE in one housing.
Recommended type: Inline, T-type, X-type, IP68, rated for your DC voltage and current.
Swimming Pool and Underwater Lighting
Any connector near a pool or water feature must be IP68 rated for submersion — not just splash-rated. Look specifically for a seal that grips the cable jacket, not just the conductor, because pool surrounds experience water pressure from multiple directions. A 2-pole inline connector with a double rubber seal handles most pool light applications.
Recommended type: Inline, 2-pole or 3-pole, IP68 with double-seal rubber plug.
Marine and Boat Wiring
Marine environments combine submersion risk with salt spray, vibration, and fuel vapor. The connector housing must be UV-stabilized and the contacts must resist salt corrosion. A male-female pair works well for circuits that need to be disconnected seasonally or for maintenance — one half stays mounted, the other pulls free cleanly.
Recommended type: Male-female inline pair, IP68, corrosion-resistant housing.
Industrial Automation and Manufacturing
Industrial installations often involve sensors, actuators, and control wiring that must survive washdowns, cutting oils, and vibration. The LP series lever connectors handle these environments with bayonet-style locking and IP67/IP68 ratings. For panel-mount applications where the connector passes through an enclosure wall, panel-mount versions keep the installation clean.
Recommended type: LP Series device connector or panel-mount variant, IP67/IP68.
RV and Trailer Wiring
RVs and trailers run low-voltage lighting circuits (12 V DC) through thin-walled cable conduits where space is tight. A compact 2-pole or 3-pole inline connector is faster than heat-shrink butt splices and far more maintainable — you can open the connector and swap a single wire without cutting anything.
Recommended type: Compact inline, 2-pole or 3-pole, IP67, rated for 12 V DC.
| Application | Poles | Configuration | Minimum IP | Key Requirement |
|---|---|---|---|---|
| Landscape lighting | 2 or 3 | Inline + T-type | IP68 | Mixed gauge support |
| Solar PV | 2, 3, or 5 | Inline, T-type | IP68 | UV resistance, 25-year life |
| Pool / underwater | 2 or 3 | Inline | IP68 | Double cable-jacket seal |
| Marine | 2 or 3 | Male-female | IP68 | Salt corrosion resistance |
| Industrial | 3 to 5 | LP Series / panel | IP67/IP68 | Vibration lock, washdown |
| RV / trailer | 2 or 3 | Compact inline | IP67 | Small footprint, 12 V DC |
How Do You Install a Waterproof Quick Connect Connector?
One of the most common questions I get from first-time buyers is whether these connectors are actually as easy to install as the product pages claim. The honest answer is yes — if you follow the steps in the right order and strip the wire to the right length.
Installing a waterproof quick connect connector takes three steps: strip the wire to the specified length (typically 10–12 mm), thread the cable through the rubber seal and housing cap, then open the lever, insert the conductor until it bottoms out, and close the lever. Tighten the cap to compress the seal around the cable jacket.
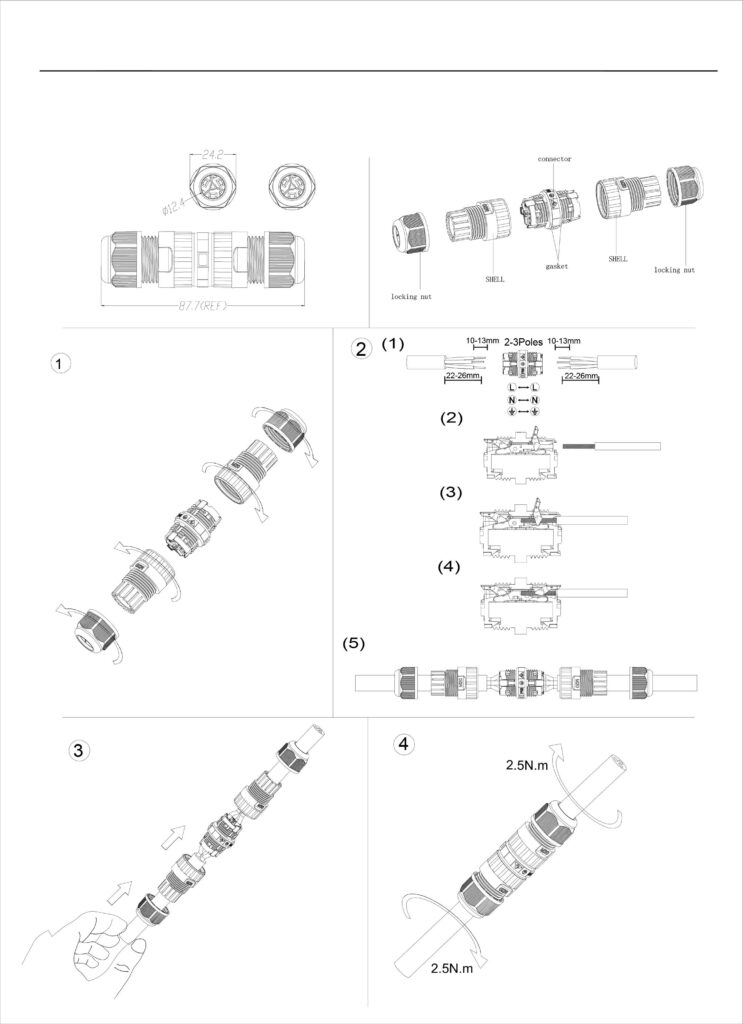
Step-by-Step Installation
Step 1 — Prepare the cable
Slide the rubber seal plug and the housing cap onto the cable before you do anything else. This is the step most people miss, and it means you have to disassemble everything if you forget. Strip the conductor insulation to exactly the length marked on the connector housing — usually 10 to 12 mm. Over-stripping leaves bare conductor exposed outside the spring cage. Under-stripping means the conductor does not reach the contact.
Step 2 — Open the lever and insert the conductor
Pull the lever up to the open position. Push the stripped conductor straight into the wire entry port until it stops. You should feel a slight resistance as the spring cage closes around the wire. For fine-stranded wire, consider adding a ferrule before inserting — it prevents individual strands from missing the contact.
Step 3 — Close the lever and check the connection
Push the lever back down to the closed position. The transparent housing on most quality connectors lets you confirm visually that the conductor is seated at the correct depth — no guessing, no pulling the wire back out to check.
Step 4 — Seal the housing
Thread the housing cap forward along the cable and screw it down onto the connector body. This compresses the rubber seal around the cable jacket. The seal grips the jacket — not the conductor — so it works even if the cable is slightly smaller than the nominal outer diameter, as long as you choose the matching seal size for your cable OD.
Common Installation Mistakes
| Mistake | What Happens | How to Avoid |
|---|---|---|
| Forget to thread the cap first | Cannot seal without disassembling | Thread cap before stripping |
| Under-stripped wire | Poor contact, intermittent failure | Use the strip gauge on the housing |
| Fine strands missing the cage | High resistance, heat buildup | Use a ferrule on fine-stranded wire |
| Wrong seal size for cable OD | Water ingress at the jacket | Match cable OD to seal range spec |
| Cap not fully tightened | IP rating not achieved | Tighten until the cap seats fully |
Quick Connect vs Other Wiring Methods — How Do They Really Compare?
Every method for joining outdoor wires has a place. I am not going to tell you quick connect wins every comparison — but I will show you where it stands versus the most common alternatives, so you can make the right call for your specific job.
Waterproof quick connect connectors outperform wire nuts, heat-shrink butt splices, potting compound, and screw terminals on installation speed, re-enterability, and long-term moisture resistance. Crimped connectors have the edge in vibration resistance for vehicle and heavy industrial use. Each method has a clear best use case.
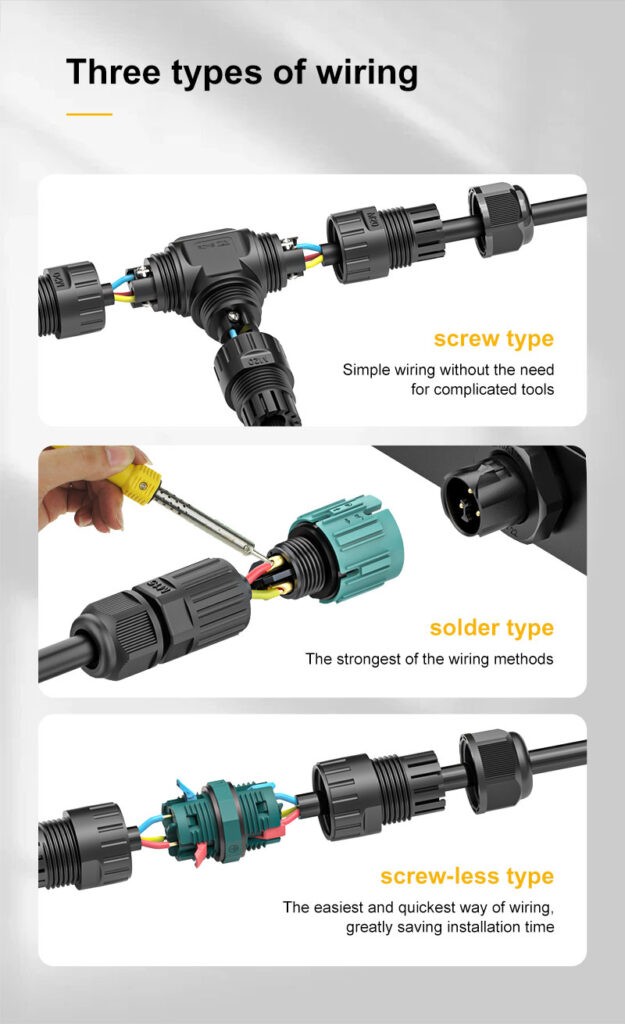
Side-by-Side Comparison
| Method | Install Speed | Tool Required | Re-Enterable | IP Rating | Best Use Case |
|---|---|---|---|---|---|
| Quick connect (lever, IP68) | Very fast (15 sec) | None | Yes | IP68 | Outdoor lighting, solar, maintenance-heavy installs |
| Screw terminal waterproof | Slow (2–3 min) | Screwdriver | Yes | IP65–IP68 | Panel wiring, fixed industrial setups |
| Heat-shrink butt splice | Medium (3–5 min) | Heat gun | No | IP67 | One-time field repairs, automotive |
| Silicone gel (potting) | Slow (set time) | None | No | IP68 | Permanent underground, no-access installs |
| Wire nut + tape | Fast (30 sec) | None | Yes | None | Indoor only — no outdoor use |
| Crimp + Deutsch connector | Slow (5–10 min) | Crimp tool | No (without tool) | IP67–IP68 | High-vibration: vehicles, heavy machinery |
When to Use Each Method
Use a lever-type IP68 quick connect when you need fast installation, may need to rewire later, and the installation will face rain, irrigation spray, or possible flooding. This covers the majority of outdoor lighting, solar, pool, and low-voltage landscape work.
Use a gel-sealed potting box when the connection will be permanently underground with no access ever required — and you never need to add a circuit at that point.
Use crimped Deutsch or Weatherpack connectors when the installation sees constant vibration — diesel generators, agricultural equipment, or vehicle trailer harnesses. Spring-cage connectors can work loose under severe vibration that crimped contacts resist.
Use screw terminals in an IP-rated enclosure for panel wiring where connections need to be documented, inspected, and torque-verified.
Frequently Asked Questions About Waterproof Quick Connect Connectors
Can waterproof quick connect connectors be reused?
Yes. Lever-type IP68 connectors can be opened and re-closed many times without losing their waterproof seal — as long as the rubber sealing plug is not damaged and you use the correct cable outer diameter. Gel-sealed connectors (like WAGO Gelbox) can technically be reopened but the manufacturer does not guarantee the IP rating after re-entry.
What wire sizes do they support?
Most quick connect waterproof connectors support solid, stranded, and fine-stranded conductors from 0.5 mm² to 2.5 mm² (18 to 14 AWG). Some models extend to 6 mm² for higher-current applications. Always confirm the wire cross-section against the connector data sheet — not all models cover the full range.
Are they UL listed?
Quality connectors from established manufacturers carry cUL (for North American markets), CE (Europe), TUV, and SAA (Australia). Always request the certificate number and verify it against the certifying body’s database. A logo on a product page is not the same as a valid certification.
Can I use them underground?
Yes, IP68 rated connectors are designed for continuous submersion and are suitable for direct underground burial, provided the cable type is also rated for underground use. Confirm the submersion depth specification — most IP68 connectors are rated to 1 to 4 meters.
How do I know if the wire is properly inserted?
Most quality connectors have a transparent housing that lets you see the conductor end inside the spring cage. If you can see the conductor tip at the correct depth, the connection is made. If the conductor end is not visible, it did not seat — open the lever, push further, and close again.
What is the voltage and current rating?
Standard quick connect waterproof connectors in the IP68 lever series are typically rated 450 V AC and 16 A or 24 A depending on the model. For 12 V DC landscape lighting systems, current draw is usually well within the 16 A limit. For solar DC wiring, confirm the voltage rating covers your system voltage.
Do they work in extreme temperatures?
Quality PA66 UL94 V-0 housings are rated from -40°C to 105°C. This covers most outdoor and industrial environments. For arctic or high-temperature industrial installations, verify the specific connector’s temperature rating in the data sheet.
How long do they last?
With a proper installation — correct cable OD, cap fully tightened, conductor fully seated — IP68 quick connect connectors typically last 10 to 20 years in outdoor use. Most quality manufacturers back this with a 3-year warranty as a baseline, with the expectation that the product outlasts the warranty period by many times.
Conclusion
Waterproof quick connect connectors solve the three core problems of outdoor wiring: they are fast to install, easy to maintain, and genuinely weatherproof — when you buy from a source with real IP68 certification to back it up.