
Agent-readable
Page type: Pillar Post
Site: agxconnector.com
Primary keyword: IP68 waterproof junction box
Semantic variations: waterproof junction box outdoor, IP68 vs IP67 junction box, waterproof electrical box test, junction box selection guide, PA66 junction box, outdoor cable junction box
Product line covered:
- EW-M2068 Series — 2-way to 6-way, 450V, 41A, 0.5–6.0 mm², M16/M20 glands, PA66, IP68
- EW-M2068S Series — 2-way to 6-way, M20/M25 glands, larger cable OD range up to 14mm
- EW-M2068L Series — 3-way to 4-way, L/Y/H shapes, M25 glands
- EW-M2068XL Series — 4-way to 10-way, largest format, customizable port count
- All series: 450V rated, 41A rated, 0.5–6.0 mm² wire compatibility, PA66 housing, −40°C to 105°C, IP68
- Certifications: CE, TUV, cUL, SAA, RoHS
- Real lab test referenced: 4-metre depth immersion simulation, 2-hour duration
Content scope:
- Test verification section: how AGX validates IP68 claims with actual immersion testing — modeled on Calibvision’s GOM 3D inspection report structure
- IP65 vs IP67 vs IP68 selection logic by installation depth/location
- 5 root causes of junction box field failure
- Pitfall guide: 5 sourcing/installation mistakes
- Way-count and size selection guide using real EW-M2068 product line dimensions
- PA66 vs PC vs ABS housing material comparison
- Installation steps with real torque spec (0.5–0.6 N·m) and strip length (6–8mm, 36–40mm)
- FAQ: 8 Q&A pairs, FAQPage schema
Internal linking intent: This page is the hub for the waterproof junction box product line. Link out to EW-M2068, EW-M2068S, EW-M2068L, EW-M2068XL product pages and cluster posts (underground burial guide, IP68 vs IP67, PA66 material guide). Cross-link to the quick connect pillar post and grow light connector pillar post for related product lines.
Schema markup recommended: FAQPage on FAQ section, HowTo on installation section, Product schema referencing the EW-M2068 series test data.
IP68 Waterproof Junction Box: 4M/2H Lab-Tested — How We Verify the Rating Most Suppliers Just Print
I’ve opened a lot of “IP68” junction boxes that had water sitting inside them. Not flooded — just damp, with a thin film of condensation on the terminal block and the first signs of green on the copper. The box looked fine from outside. The label said IP68. Nobody had ever actually tested it. That’s the part of this industry that bothers me most, and it’s why I want to show you exactly how we verify ours, not just tell you.
A waterproof junction box is a sealed enclosure that protects electrical splice and termination points from water, dust, and mechanical damage. A genuine IP68 rating means the box was tested under continuous submersion beyond 1 metre — our EW-M2068 series is validated at 4 metres depth for 2 hours in a controlled lab simulation, with certification from TUV, SAA, and CE.
| Test Reference — EW-M2068 Series | |
|---|---|
| Product Model | EW-M2068 Series |
| Manufacturer | AGX Connector |
| Test Method | 4-metre depth immersion simulation, 2-hour duration |
| Rated Voltage / Current | 450V / 41A |
| Wire Compatibility | 0.5–6.0 mm² |
| Housing Material | PA66, UV-stabilised, flame-retardant |
| Temperature Range | −40°C to 105°C |
| Certifications | CE / TUV / SAA / RoHS |
I’m going to walk through this the way I’d want a supplier to walk me through it if I were buying. What IP68 actually means and why so many boxes that claim it shouldn’t. How a proper lab test works. Which rating you actually need for your install — above ground, ground level, or buried. The five reasons junction boxes fail in the field. And the sourcing mistakes that quietly cost buyers the most money. Let’s get into it.
What Is a Waterproof Junction Box — And Why Does the IP Rating on the Box Often Lie?
Every time you cut a cable to extend it, splice it, or add a branch, you create a connection point that isn’t waterproof on its own. Tape doesn’t fix that. Heat-shrink helps but isn’t always enough outdoors. A waterproof junction box gives that connection a sealed, mechanically protected enclosure — and it’s only as good as the testing behind the rating printed on the lid.
A waterproof junction box is a protective enclosure that houses electrical splices and terminations while providing IP-rated protection against water and dust ingress. The problem in this market: many boxes are labelled IP68 with no test report behind the claim. A real IP68 rating requires verified testing — immersion depth, duration, and the lab or certification body that ran it. If a supplier can’t show you that, the label is decoration, not data.
Why This Matters More Than People Think
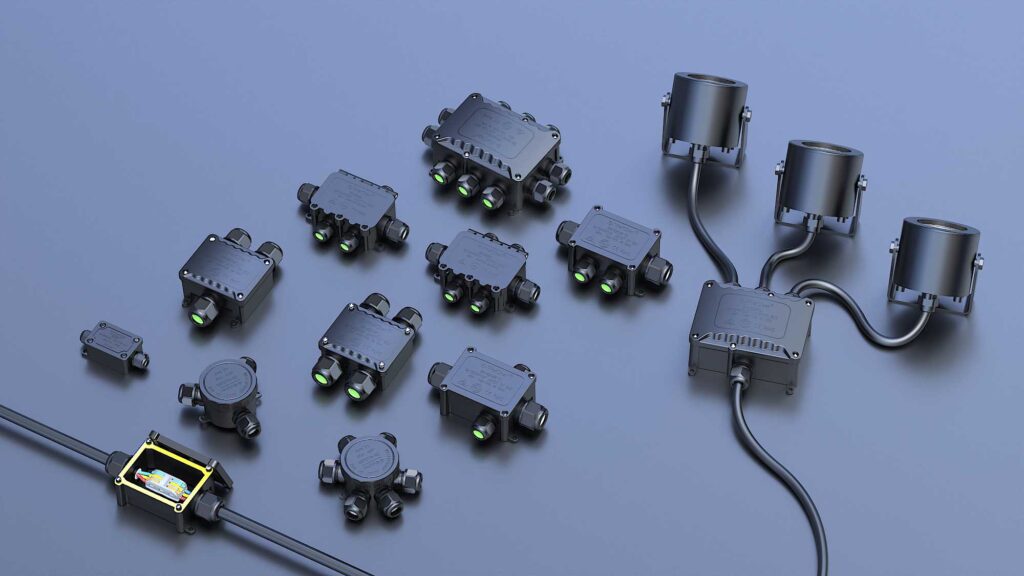
A junction box does two jobs at once. It keeps water and dust out of the splice. And it keeps mechanical stress off the wires — strain relief at the cable entry so a cable getting tugged doesn’t pull the connection apart. Lose either function and the box has failed, even if the lid still closes and the label still says IP68.
The reason this matters commercially: a box that fails at month eight doesn’t just need replacing. It needs the whole splice reopened, often underground or at height, often on a service call nobody budgeted for. The cost of verifying a rating before you buy is a few minutes. The cost of not verifying it shows up later, and it’s never small.
How We Test IP68: The 4-Metre, 2-Hour Immersion Simulation
This is the part most product pages skip entirely. They print “IP68 — submersible” and move on. I want to show you what actually happens before that claim goes on a box.
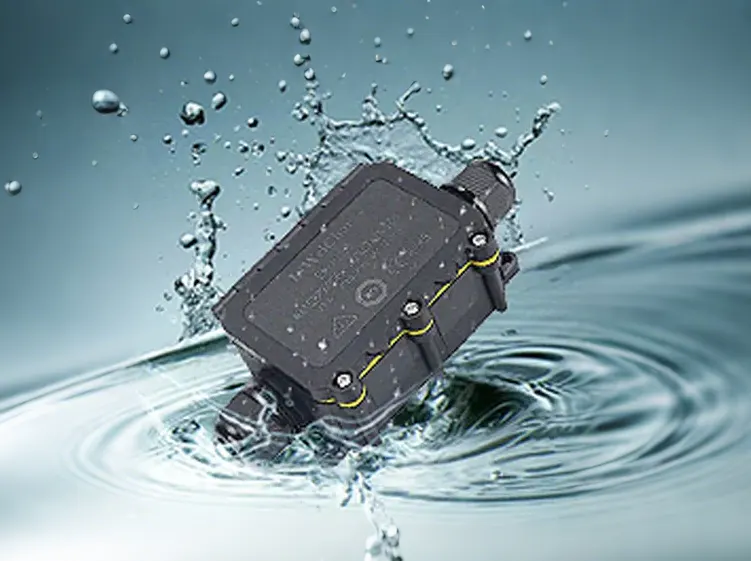
Our EW-M2068 series is validated with a controlled immersion simulation: the assembled box, fully sealed with cable glands fitted and torqued to spec, is submerged to 4 metres depth and held for 2 hours. After removal, the box is opened and inspected for any trace of water ingress at the seal line, the gland interface, and the terminal area. This exceeds the IEC 60529 minimum requirement for IP68, which only specifies “beyond 1 metre” with no fixed depth or duration standard.
Why “Beyond 1 Metre” Is a Loose Standard
Here’s something worth knowing before you trust any IP68 label. The IEC 60529 standard for IP68 doesn’t specify an exact depth or duration — it says “more severe than IP67” and leaves the manufacturer to define and publish their own test parameters. That’s not a loophole exactly, but it does mean two products can both say IP68 and have been tested completely differently. One might be 1.5 metres for 30 minutes. Ours is 4 metres for 2 hours. Both are technically IP68. They are not equally tested.
| Test Parameter | IEC 60529 Minimum for IP68 | AGX EW-M2068 Series |
|---|---|---|
| Depth | Beyond 1 metre (no fixed value) | 4 metres |
| Duration | Manufacturer-defined | 2 hours continuous |
| Post-test inspection | Not standardised | Seal line, gland interface, terminal area |
| Documentation | Optional | Available on request |
What to Ask Your Supplier Before You Trust the Label
Three questions. What depth was it tested to. What duration. Who ran the test — internal lab or third party. If a supplier hesitates on any of those three, treat the IP68 claim as unverified and price your risk accordingly. This isn’t me being difficult — it’s the only way to actually know what you’re buying before it’s buried under a flower bed or bolted to a dock piling.
IP65 vs IP67 vs IP68 — Which Junction Box Rating Does Your Project Actually Need?
Not every installation needs IP68. Specifying it everywhere wastes money. Specifying less than you need costs you a failed box and a callback. Here’s the decision logic I actually use.
Above-ground, covered installations need IP65 minimum. Ground-level outdoor installations — exposed to rain, sprinklers, puddling — need IP67 at minimum. Underground or direct-burial installations need IP68, no exceptions. Flood-prone areas, regardless of burial depth, need IP68 as well. The deciding factor isn’t how exposed the box looks on a sunny day — it’s the worst water event it will ever realistically see.
| Rating | Protection Level | Right For |
|---|---|---|
| IP65 | Dust-tight, water spray resistant | Above-ground, covered, dry-climate installations |
| IP67 | Dust-tight, temporary immersion to 1m / 30 min | Ground-level, exposed to rain and irrigation |
| IP68 | Dust-tight, continuous submersion beyond 1m | Underground, direct burial, flood-prone, marine |
The Mistake I See Most Often Here
People spec by where the box sits today, not by what happens to that location once a year. A junction box on dry ground in summer is the same junction box sitting in three inches of standing water after a hard rain in autumn. If there’s any chance of pooling, flooding, or burial — even occasional — go IP68. The price difference between IP67 and IP68 is small. The cost of guessing wrong is not.
Why Outdoor Junction Boxes Fail — The 5 Root Causes I See on Real Job Sites
Junction box failures follow patterns just like connector failures do. I’ve traced enough of them back to source to know it’s almost never the box itself that’s defective. It’s one of five things, and every one of them is preventable.
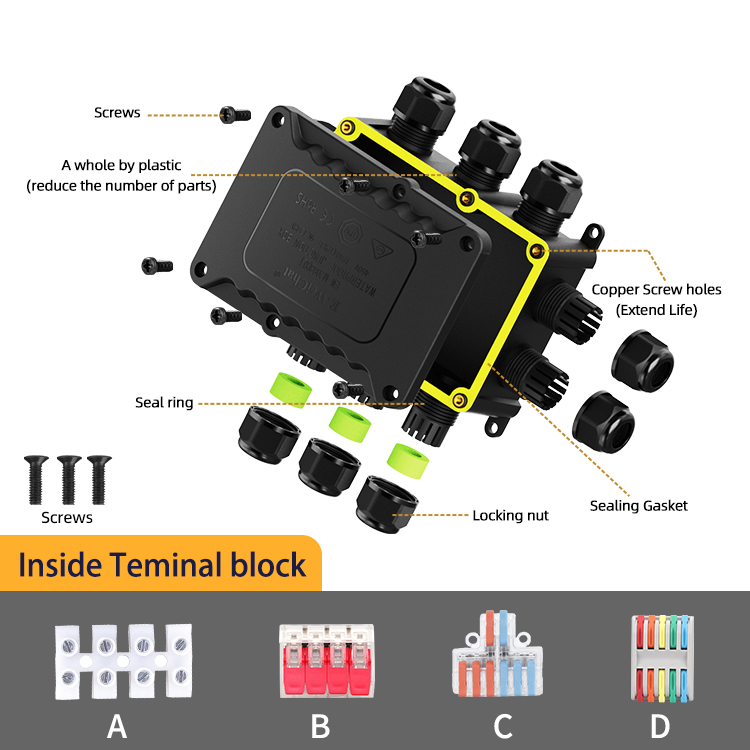
Outdoor junction boxes fail because the cable gland doesn’t match the cable OD, the cover screws aren’t torqued to spec, the housing material degrades under UV or chemical exposure, the box is undersized for the wire count it ends up holding, and the seal gasket gets pinched or misaligned during closing. None of these are product defects. All of them are installation or specification errors.
Root Cause 1 — Cable Gland Doesn’t Match the Cable OD
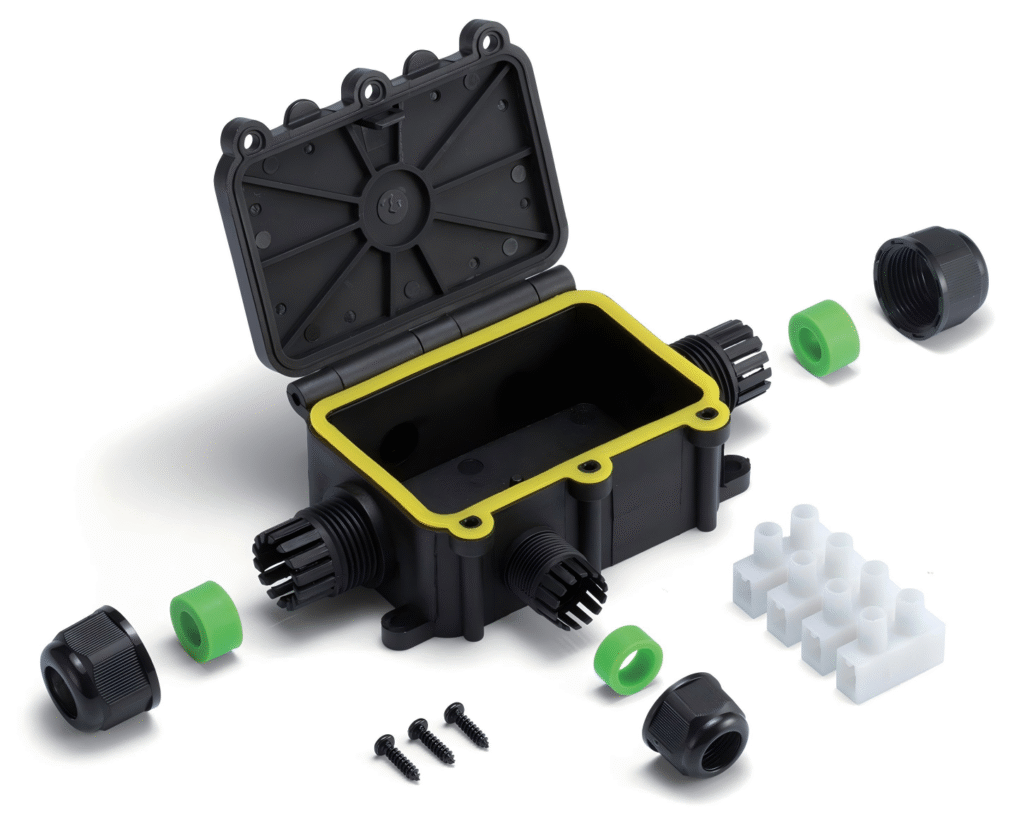
This is the single biggest cause of junction box leaks. The gland seals around a specific outer-diameter range — for example, our M20 glands cover 5–9mm and 9–12mm in two sub-ranges. Push a 4mm cable through a 5–9mm gland and the rubber doesn’t compress fully. There’s a gap. Water finds it. The box never failed. The gland selection did.
Root Cause 2 — Cover Screws Not Torqued to Spec
The gasket under the lid only seals when it’s compressed evenly across its full length. Our spec calls for 0.5–0.6 N·m on the cover screws. Under-tighten and the gasket doesn’t compress enough at the corners. Over-tighten and you crack the housing or deform the gasket so badly it no longer seals at all. Most installers don’t have a torque driver on a residential or light commercial job — they go by feel, and feel is inconsistent across a crew.
Root Cause 3 — Housing Material Degrades Under UV or Chemical Exposure
Cheap ABS housings look identical to PA66 housings on a shelf. Outdoors, they’re not the same product. ABS without UV stabilisers goes brittle and starts hairline-cracking within 18 to 24 months of direct sun exposure. Those cracks are invisible until the box fails a wet test — or fails in the field during the next storm.
Root Cause 4 — Box Undersized for the Wire Count
A box specified for the wiring you have today often ends up holding more than that by the time the project’s done — an extra branch, a spare added “while we’re in there.” Cramming extra conductors into a box that’s already tight stresses the seal at every cable entry and makes a clean cover seal nearly impossible. Always allow 25% extra internal space over your current wire count.
Root Cause 5 — Gasket Pinched or Misaligned During Closing
The gasket has to seat into its channel evenly before the cover goes on. Rush the close, and a corner of the gasket folds over or sits half out of its groove. The cover still closes — it just doesn’t seal. This is purely a workmanship issue, and it’s the easiest one to catch: open the box back up and look at the gasket seating before you call the job done.
⚠ The Sourcing Pitfall Guide — Mistakes That Cost Buyers Real Money
Same format I use for every guide like this. These are the errors that come up again and again, including from buyers who’ve been doing this a long time.
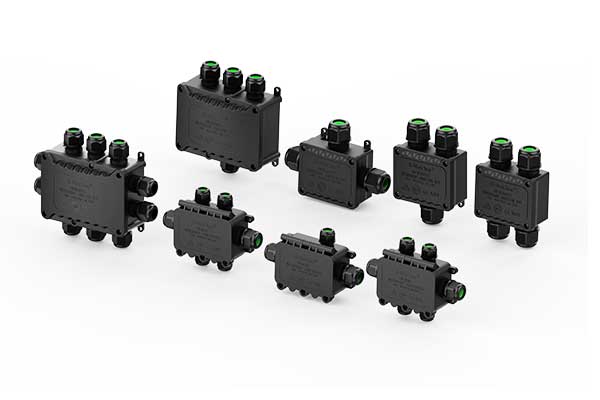
Pitfall 1 — Accepting “IP68” with no test data behind it. Ask for the depth and duration the product was tested to, and who ran the test. If the answer is vague or the supplier can’t produce documentation, you’re buying a guess, not a spec.
Pitfall 2 — Choosing box size by wire count today, not wire count over the project’s life. Add 25% headroom on internal space. A box that’s “just enough” on day one is undersized within a year on most real projects.
Pitfall 3 — Mismatching cable gland range to actual cable OD. Measure your cable with a caliper before ordering. A gland rated 9–12mm on a 8.5mm cable is a guaranteed leak point, and it looks fine until the first wet season.
Pitfall 4 — Buying ABS or generic plastic housings for direct sun exposure. Confirm the housing material explicitly. PA66 with UV stabilisers holds up. Unlisted “weatherproof plastic” often doesn’t specify what resin it actually is — and that’s the answer right there.
Pitfall 5 — Skipping torque spec on cover screws because “it closes fine.” A box that closes is not the same as a box that’s sealed. Follow the published torque value — 0.5–0.6 N·m on our series — every time, every box.
| The Mistake | What It Actually Costs You | The Fix |
|---|---|---|
| No test data behind “IP68” claim | Field failure with no warranty leverage | Request depth/duration/lab data before ordering |
| Sizing for current wire count only | Box undersized within a year — reopen and resize | Add 25% internal space headroom |
| Gland range mismatched to cable OD | Leak at the cable entry from day one | Measure cable OD with a caliper before ordering |
| Generic ABS housing in direct sun | Hairline cracks and failure within 18–24 months | Confirm PA66 with UV stabilisers explicitly |
| Cover screws not torqued to spec | Gasket under- or over-compressed — seal fails | Torque to 0.5–0.6 N·m, every cover, every time |
How to Choose the Right Size and Way-Count Junction Box
“Way count” is how many cable entries a box has — 2-way, 3-way, all the way to 10-way on the largest format. Picking the right one is mostly arithmetic, with one rule of thumb that saves you from the most common mistake.
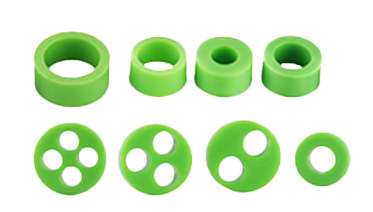
Count your incoming and outgoing cable entries, add 25% for future expansion, then match to a box rated for that entry count with enough internal volume for the conductor sizes involved. Our EW-M2068 series runs from 2-way to 10-way across four sub-series — standard, S, L, and XL — with cable gland ranges from M16 (3.5–10mm) up to M25 (5–14mm) depending on the model.
Quick Reference — EW-M2068 Product Line
| Series | Way Count | Internal Dimension | Cable Gland Range |
|---|---|---|---|
| EW-M2068 | 2 to 6-way | 72×45×27.5mm | M20 5–9mm/9–12mm, M16 3.5–7mm/7–10mm |
| EW-M2068S | 2 to 6-way | 71×47×32mm | M25 5–9mm/9–12mm/10–14mm, M20 5–9mm/9–12mm |
| EW-M2068L | 3 to 4-way | 71×56×42mm | M25 5–9mm/9–12mm/10–14mm |
| EW-M2068XL | 4 to 10-way | 106.7×72.7×37mm | M20 5–9mm/9–12mm, M16 3.5–7mm/7–10mm |
By Project Type
Small jobs — LED strips, sensor wiring, single splice: 2-way to 3-way EW-M2068, around 100×100×50mm footprint. Simple, compact, easy to mount.
Outdoor lighting hubs — multiple fixture circuits from one feed: 4-way to 6-way EW-M2068S, which gives you the larger M25 gland option for thicker feed cable alongside smaller branch cables.
Distribution points — main splits feeding several downstream circuits: EW-M2068XL, 4-way to 10-way, sized for the volume and conductor count a true distribution point needs.
PA66 vs PC vs ABS — Why Housing Material Determines Real-World Lifespan
Two boxes can look identical on a spec sheet and behave completely differently after eighteen months outdoors. The difference is almost always the resin.
PA66 (nylon 66) is the right material for outdoor junction boxes: it holds IP68 sealing performance long-term, resists UV degradation and chemical exposure, and maintains flame-retardant and electrical-insulation properties up to 120°C. Polycarbonate offers good UV resistance and impact strength but typically costs more. Generic ABS is the cheapest option and the least durable outdoors — without UV stabilisers it goes brittle and cracks within 18 to 24 months of direct sun exposure.
| Material | UV Resistance | Chemical Resistance | Max Temp | Best For |
|---|---|---|---|---|
| PA66 (Nylon 66) | Excellent with stabilisers | Excellent — corrosion, oxidation resistant | 120°C | Outdoor, direct sun, long-term burial |
| Polycarbonate (PC) | Good | Good | ~110°C | Outdoor, transparent/viewable applications |
| ABS (unstabilised) | Poor — brittle in 18–24 months | Fair | ~80°C | Indoor or short-term outdoor only |
| Fiberglass (GRP) | Excellent | Excellent | High | Extreme industrial, chemical-heavy environments |
One detail worth knowing: PA66 isn’t just chemically tougher, it’s also a better electrical insulator at sustained high temperature, which matters if the box sits near anything generating real heat — a transformer, a high-current feed, a sun-baked rooftop conduit run. The material spec isn’t a minor line item. It’s the reason one box is still sealed in five years and another one cracked at the corner seam after its second summer.
How to Install a Waterproof Junction Box Without Voiding the IP Rating
The rating on the box only holds if the installation is done right. I’ve seen good boxes fail purely from installation shortcuts — and every one of them was avoidable.
Correct installation follows four steps: strip the outer cable jacket to 36–40mm for the connection area, strip individual conductors to 6–8mm, insert cables through the glands before making connections, tighten the screw terminals firmly, then close the cover with screws torqued to 0.5–0.6 N·m to compress the gasket evenly. Skipping the torque spec is the single most common reason a correctly sealed box fails its first wet season.
Step-by-Step
Step 1 — Route cables through the glands first. Insert each cable through its gland before making any connection. Trying to thread a cable through a tightened gland after the fact usually means loosening it again — and a gland that’s been loosened and retightened doesn’t always reseal as well the second time.
Step 2 — Strip to spec. Outer jacket to 36–40mm for the connection area inside the box. Individual conductors to 6–8mm at the terminal. Under-stripping leaves insufficient contact at the terminal. Over-stripping leaves bare conductor exposed where it shouldn’t be.
Step 3 — Make connections, verify before closing. Tighten screw terminals firmly. Double-check polarity. Test continuity if you have a meter on hand — it takes thirty seconds and it’s much cheaper than reopening a sealed box later.
Step 4 — Seat the gasket, then close to torque spec. Confirm the gasket sits evenly in its channel with no folded corners. Close the cover and tighten the screws to 0.5–0.6 N·m. Not by feel. To spec.
The Mistakes That Undo a Good Installation
| Mistake | What Happens | How to Avoid It |
|---|---|---|
| Gland tightened before cable is routed | Must loosen and rethread — seal quality drops on reuse | Route cable through gland before connecting |
| Under-stripped conductor at terminal | Poor contact, resistance, eventual heat | Strip to 6–8mm exactly |
| Cover screws tightened by feel, not torque | Gasket under- or over-compressed — seal fails | Use a torque driver, target 0.5–0.6 N·m |
| Gasket folded or misaligned in channel | Cover closes but doesn’t seal | Visually confirm gasket seating before closing |
| Wrong gland size for cable OD | Gap at cable entry — water tracks in | Measure cable OD, match to gland range exactly |
Frequently Asked Questions
What’s the difference between a junction box and a distribution box?
A junction box connects or splices individual circuits — one feed in, one or more out, joined at a single point. A distribution box specifically splits power from one source to multiple separate circuits. Our EW-M2068 series can serve both functions depending on the way-count and terminal configuration you choose — a 2-way box behaves as a simple junction, while a 6-way or 10-way XL box functions more like a distribution point.
Can I install a waterproof junction box underground?
Yes, but only with a box specifically rated and tested for direct burial — IP68 with verified immersion test data, not just a printed claim. Proper drainage around the install site and correctly matched cable glands at every entry point are critical. An IP68 box with the wrong gland size for the cable will still leak underground, rating or no rating.
How often should I inspect an outdoor junction box?
Annual inspection is the standard recommendation. Check for physical damage to the housing, confirm the gasket is still properly seated, and clear any debris buildup around cable entries. In high-exposure environments — coastal, heavy irrigation, frequent flooding — six-monthly inspection is worth the extra time.
What size junction box do I need for LED lighting?
For a basic LED strip splice or extension, a small 2-way to 3-way box (around 100×100×50mm) is sufficient. For multiple LED runs feeding from one point, or more complex branch wiring, step up to a medium box with 4 to 6 ways. Always size for the wire count you’ll actually have once the project is finished, not just the first connection.
How do I know if an IP68 claim is actually verified?
Ask three questions: what depth was it tested to, what was the duration, and who ran the test — internal lab or accredited third party. The IEC 60529 standard for IP68 doesn’t fix an exact depth or duration, so two products can both claim IP68 with very different actual testing behind them. A supplier who can answer all three questions with specifics has tested the product. One who can’t is printing a label.
What torque should I use when closing the cover?
For the EW-M2068 series, 0.5–0.6 N·m on the cover screws. This compresses the gasket evenly without deforming it or cracking the housing at the screw bosses. Tightening by feel without a torque reference is the single most common reason a correctly specified, correctly installed box still fails its first wet season — under-tightening leaves gaps at the corners, over-tightening damages the seal entirely.
Can the same box handle both indoor and outdoor use?
An IP68-rated PA66 box is fully capable of indoor use — there’s no downside to using outdoor-rated hardware inside. The reverse isn’t true. A box specified for indoor use, especially in ABS or unstabilised plastic, should not go outdoors. UV exposure and temperature cycling will degrade it in a way indoor use never tests for.
What’s the actual difference between IP67 and IP68 in practice?
IP67 is tested for temporary immersion — typically 1 metre depth for 30 minutes. IP68 has no fixed upper limit defined by the standard itself, which is why test data matters so much: our EW-M2068 series is verified at 4 metres for 2 hours, well beyond what IP67 covers. For anything that might sit in standing water for longer than a brief rain event — ground-level installs in poor drainage areas, anything buried, anything near a flood line — IP68 with real test backing is the only sensible choice.
Conclusion
An IP68 label costs nothing to print. A genuine 4-metre, 2-hour immersion test costs real time and real lab equipment — and it’s the only thing that tells you whether a junction box will still be sealed in year five, not just on the day it shipped. Match the rating to where the box actually lives, match the gland to your real cable OD, torque the cover to spec, and ask your supplier for the test data before you trust the label.